Extensible Data Security (XDS) with Dynamics 365 Finance and Operation
September 12, 2018 6 Comments
XDS is one of the sparkling features in Dynamics. It takes you beyond the forms achieving the ultimate data control. It is one of the key features that captivate the customer heart and mind. It is a great dramatic closing for your demos.
So for example you have Buyer who only work with selective suppliers and deals on selective items, in such data security scenarios we can use XDS Extensible Data Security.
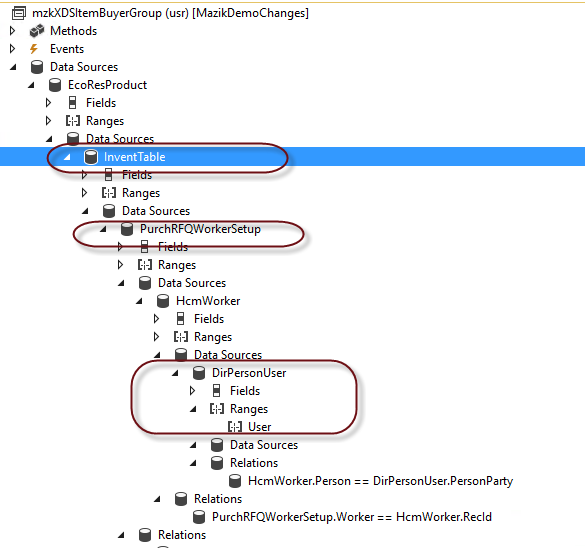
for example on one of the demo i have created this XDS policy where i am filtering the items based on Buyer group (we can do Buyer group settings on different levels, Worker, Items, Supplier ). We are using custom security roles and policies (using XDS Framework) in this implementaion. We have created a security policy query on ECORESPRODUCT table as shown below. It filters the item based on Buyer group assigned to current logged in worker.
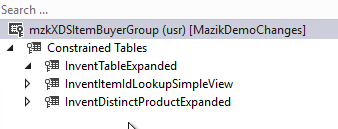
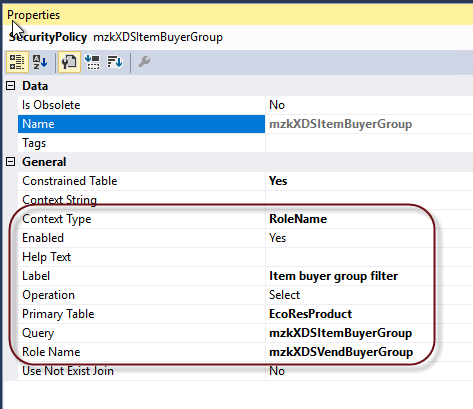
Then we have created the security policy and added the constraints tables, Property settings related to this security policy is shown below. Lastly we associate the role with the security policy to apply the data security/filter on that specific role. So now when we assign that custom role to any user, that user will see the filtered items.
- Set the PrimaryTable property on the policy to EcoResProduct.
- Set the Query property on the policy to custom query we have created above.
- If you want the primary table to be secured using this policy, set the ConstrainedTable property to Yes.
- Set the Enabled property to Yes or No. This property can be used to control whether the policy will be enforced by the extensible data security runtime.
Setting the context
Set the ContextType property to one of the following:
- ContextString – Set the property to this value if a global context is to be used to determine whether the policy should be applied. When required, this context string needs to be set by the application using the XDS::SetContext API.
- RoleName – Set the property to this value if the policy should be applied only if a user in a specific role accesses the constrained tables.
- RoleProperty – Set the property to this value if the policy is to be applied only if the user is a member of any one of a set of roles that have the ContextString property set to the same value.
When adding a constrained table, you must also choose the relationship to be used to join the primary table with this constrained table.
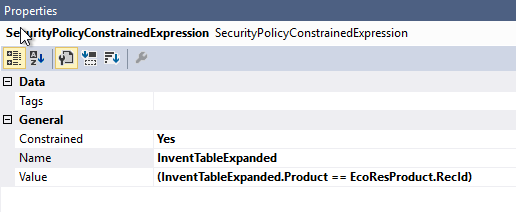 Now build , synchronize the AOT Query and Security policy, Refresh browser and open Released product form.
Thank you for reading
Happy Daxing 🙂

 This is Amir Nazim from Karachi Pakistan, having very good experience on Microsoft Dynamics AX and related technologies, currently working as Microsoft Dynamics Ax Sr. Development Engineer and Solution Architect in MBS (Implementation) team.
