Stock/Inventory Value Storage report

There are two types of inventory value report: Inventory/stock value (the standard report) and Inventory/Stock value report storage. this blog is about Inventory Value report storage and how can we used data management to export data into file.

The Inventory/Stock value report storage report provides output either as an interactive page in Microsoft Dynamics 365 Supply Chain Management or as an exported document in one of several formats.

When you view the report in your browser, columns and aggregate balances are dynamically adjusted, depending on the layout that you’ve configured. You can sort the results, filter them, drill down into the data, and more.

Report results are stored in the Inventory/Stock value report storage data entity. Therefore, you can filter and export the results to a format such as comma-separated values (CSV) or Microsoft Excel format.

The Inventory/Stock value report storage report is helpful when the output contains many lines. 

To access menu, navigate to Cost management -> Inquiries and reports -> Inventory/Stock value report storage.

Click “New” button on Stock value report storage form and enter execution name and other search parameters.

You can schedule the batch job and monitory the progress

Once the execution is completed, we can create export data management project for entity “Inventory value report storage”
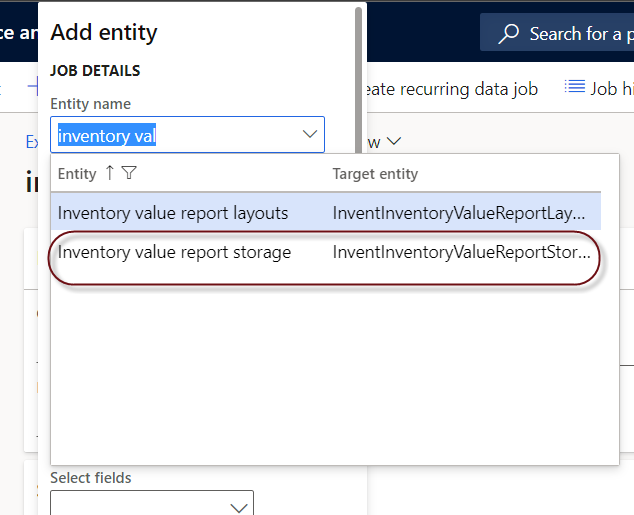
select the filter in data management and define execution name like for this examples “SVR-Feb01” is used.

Execute the data management project and download the stock value report as file.

Change default “Purpose” of Address/Contact in D365FO

I was exploring how we can change the default purpose of Address or Contact, by default the purpose is “BUSINESS” and i was having the requirement to default it to “INVOICE”. Unfortunately i did not find any functional way, i was hoping this should be configuration somewhere to change it.

regardless i have to debug the code and produce technical solution.

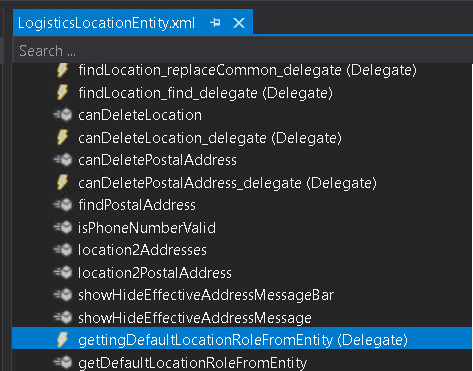
Luckily there is a class LogisticsLocationEntity exists and it has “delegate” that allows subscribers to write custom defaulting logics

i did check if there are any existing references of the delegate and happy to see some examples.

after small study i was able to find existing example, so basically the defaulting logic is working based on Table Id and i can see the existing implementation of subscriber class “LogisticsLocationEntityAppUtil”

Alerts for Number sequence numbers running out

we recently faced a problem where a number sequence reached its limit, although it was a bug in configuration and number sequence should be set to range like 9 digits 999,999,999, but this query below can be used to identify the number sequence which are reaching to its limit. 
One can setup some alerts or some batch job that may be run on monthly basis and produce number sequences that are reaching consumption to let say 70%

 SELECT [NUMBERSEQUENCE]  
    ,[TXT]  
    ,[LOWEST]  
    ,[HIGHEST]  
    ,[NEXTREC]  
       ,100 * (NEXTREC - LOWEST)/(HIGHEST - LOWEST) as 'Percent Consumed'   
  FROM [dbo].[NUMBERSEQUENCETABLE]  
  where (NEXTREC - LOWEST) >= (HIGHEST - LOWEST) * 0.2  


D365 Finance and Operation – Creation of Bulk Users from Excel using Excel addin

In this post I will show how easy you can connect to your Dynamics 365 Operations instance using Excel. Before I begin the post, let me just remind you that importing users from Azure Active Directory is perhaps easier and quicker. So this post is just to show you it is also possible to import users using Excel with the Dynamics Office Add-in.

Open excel and see if you have office add-in installed

Click to activate that. It will ask for server details

Enter server details where you want to create users

https://amirrcmlitevm7e03fdevaos.cloudax.dynamics.com/

it will ask for sign in, please do that.

If add-in load fine and sign in is successful you will see this screen with Design button enabled. Please click that

Click add table select “User information SYSTEMUSER” entity

Add all the required * fields and additional these fields as well.

You may add more or less fields as needed.

At any point Design can be change for adding or removing the fields.

Click Refresh for bringing the columns and data to sheet

Create new records by following the existing ones.

Click Publish for publishing records to Finops.

You can see the records in System administration module.

If you see Loading applets issue while connecting to Microsoft Dynamics 365 for Operations through Excel add-in

At the time of loading applets, the following error came up: “No applet registrations found”.

Go to system administration > Setup > Office app parameters

https://amirrcmlitevmc2s.cloudax.dynamics.com/?cmp=USMF&mi=OfficeAppParametersPage

Initialize app parameters

Initialize applet registration